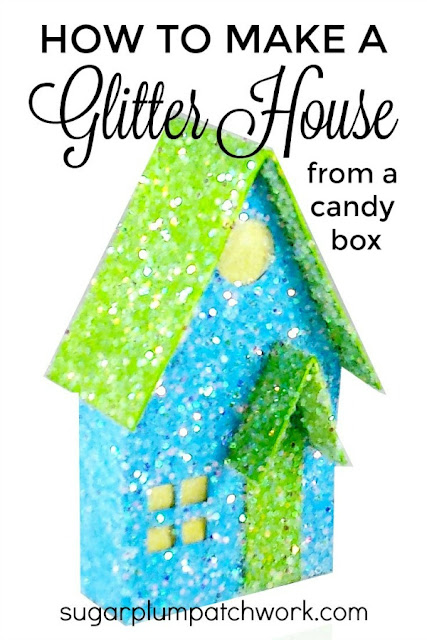
These glitter houses, or putz houses, are so sweet and fun to make, and when a little candy box found it's way into the house I was inspired to transform it.
How to Make a Glitter House From a Candy Box
What you will need:
A small candy box - or other little box you want to use (see below)A small piece of extra cardboard - for the roof, a roof over the door, and a base, if desired.
paper, vellum, cellophane or wax paper for windows
acrylic craft paints in your choice of colors
glue (Elmers Glue-all is a good choice but any white glue will work)
glitter (a clear or "crystal" glitter looks good on any paint color)
scissors
xacto knife (you can get away with scissors for cutting out the house but an xacto knife makes it easier to cut out the window and light holes)
metal ruler - for use with the xacto knife
paint brushes - for paint and glue
Making the glitter house
 |
| Small candy box cut into the house shape |
Step One - Open the box carefully and lay it flat. I used the plain brown inside of the box as the outside of my house. That way if some of the print on the outside of the box shows through the paint it won't show on the finished house.
Step Three - Cut out the window holes (and light hole if desired) using the xacto knife
 |
| Here is a picture of the plain side of the box. You can see how I have drawn out the shapes I cut. |
Step Five - Cut the roof, a base, if desired, etc., out of the extra cardboard. The roof needs to be long enough and wide enough to overhang some on each side. This will depend on the size of your box. Start larger and cut it down until you get the size you like.
Step Six - Prime and paint the house (you can prime with white paint. I use gesso) and glue the pieces together. Clothespins or paper clips make good clamps for holding pieces together while they dry. Sometimes I paint the pieces before I put the house together, sometimes after. It's especially helpful to paint the roofs, window frames and doors before you apply them. Let the house dry after painting and after gluing.
| Here are the pieces of the house all painted. |
 |
| Clothespins make great clamps. |
 |
| Insert the windows |
Step Eight - Apply glitter
Brush one section of the house at a time with glue . . .
 |
| Brush on glue. Do one side of the house at a time. |
And sprinkle with glitter.
 |
| Sprinkle with glitter. This is the best part! |
If you want to use a different glitter for the trim on your house - doors, roof, window frames, etc., glitter them before you glue them to the house. In this case, I am using the same glitter for everything. Be sure to let the glue and glitter dry before handling the house.
You can glue the bottom of the box back together in order to close it up.
This particular house is quite tiny so I think it will become a tree ornament. But you can glue it to a cardboard base if you like.
And remember - you can use any size box depending on what size house you want to make. There is no end to the styles, details and embellishments you can add so use your imagination and have fun!
Have a creative week!
-Laney


No comments
Post a Comment
I'd love to hear what you have to say
Note: Only a member of this blog may post a comment.